Active Directory
Tool used:
- Active Directory
Scope: This documentation defines the step-by-step process for creating, modifying, disabling, and deleting user accounts in Active Directory (AD), creating and managing Group Policies, and adding both Windows and Linux computers to the AD domain using the organization’s standard domain-joining procedures
Process Description:
a) User creation -
i.Create the user account in Active Directory (AD) with the required details.
ii.Assign the user to the correct Organizational Unit (OU).
iii.Add the user to the appropriate security groups based on their role.
b) Group Policy Creation -
i.Open the Group Policy Management Console (GPMC).
ii.Create a new Group Policy Object (GPO) with a suitable name.
iii.Configure the required settings inside the GPO (e.g. wallpaper lock).
iv.Link the GPO to the appropriate Organizational Unit (OU).
v.Update Group Policy on the target systems using gpupdate /force.
vi.Verify that the policy is applied successfully on user or computer systems.
c) Adding Windows and Linux Systems to Active Directory -
Windows
i.Update network adapter settings to use the organization’s DNS server.
ii.Join the computer to the designated AD domain via system properties.
Linux
i.Execute the join-ad.sh script to join the computer to the AD domain.
Note: join-ad.sh code is given in process section.
ii.The script applies required configurations and registers the system in AD.
High Level Process Diagram


Process
a) Creating User account
Step 1 : Create the user account in Active Directory (AD) with the required details.
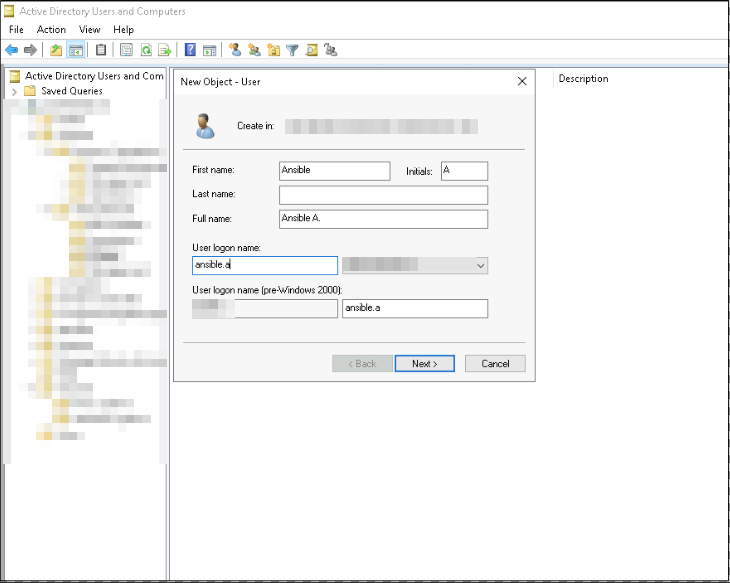
i. Open Active Directory Users and Computers (ADUC) from the Domain Controller
ii. Right-click the OU and select New → User.
iii. Enter the required user information:
1
2
3
4
5
I. First Name
II. Last Name
III. Initial
IV. User Logon Name
IV.Click Next to proceed.
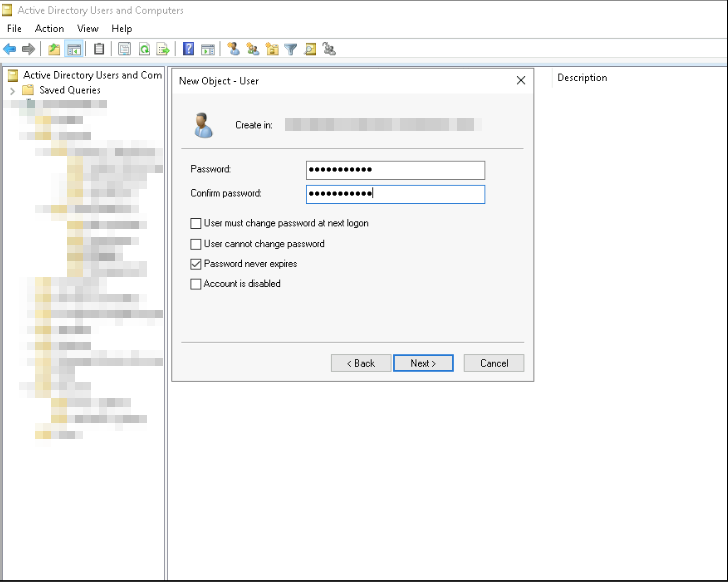
v. Password can be set by the user
vi. Select the appropriate options such as password never expires
vii.Click Finish to create the user object in AD.
Step 2 : Assign the User to the Correct Organizational Unit (OU)
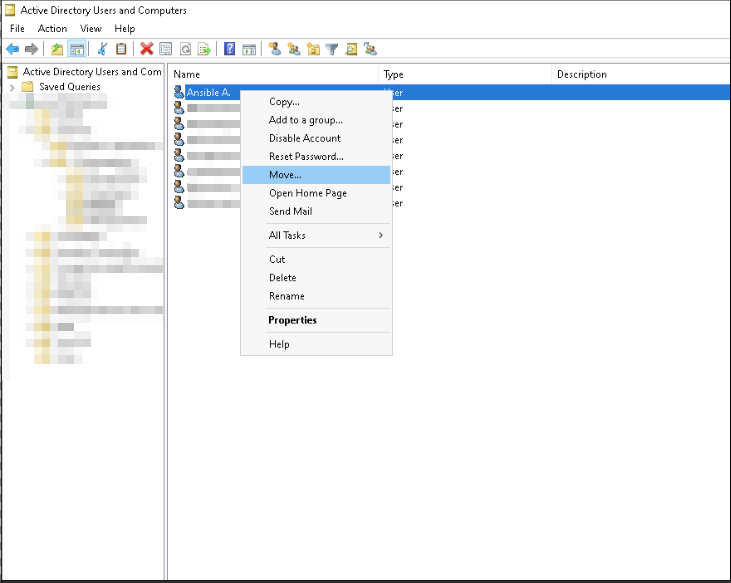
i.Identify the correct OU based on department
ii.Right-click the newly created user object and select Move.
iii.Choose the appropriate OU from the directory tree.
iv.Confirm the move to ensure the user inherits the correct Group Policies (GPOs) and departmental configurations.
Step 3 : Add the user to the appropriate security groups based on their role.
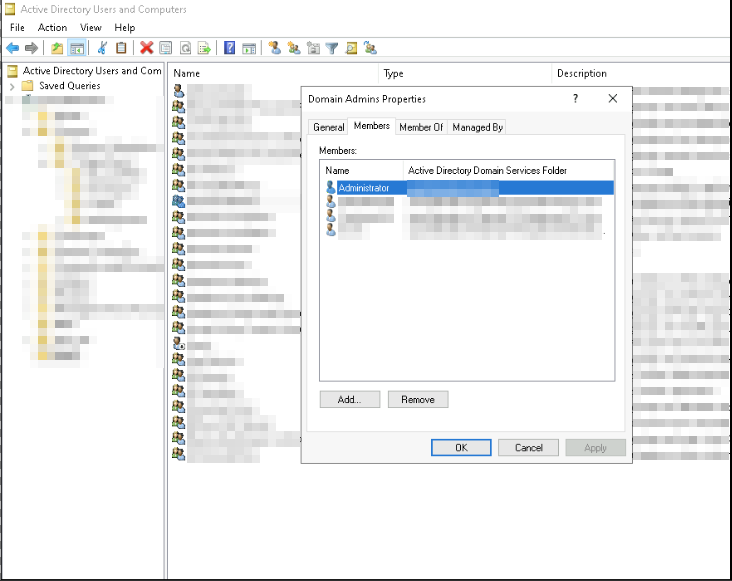
i.All new users are created as standard users with default permissions.
ii.Only authorized personnel (IT support) are granted access to critical systems.
b) Group Policy
Step 1 : Open the Group Policy Management Console (GPMC).
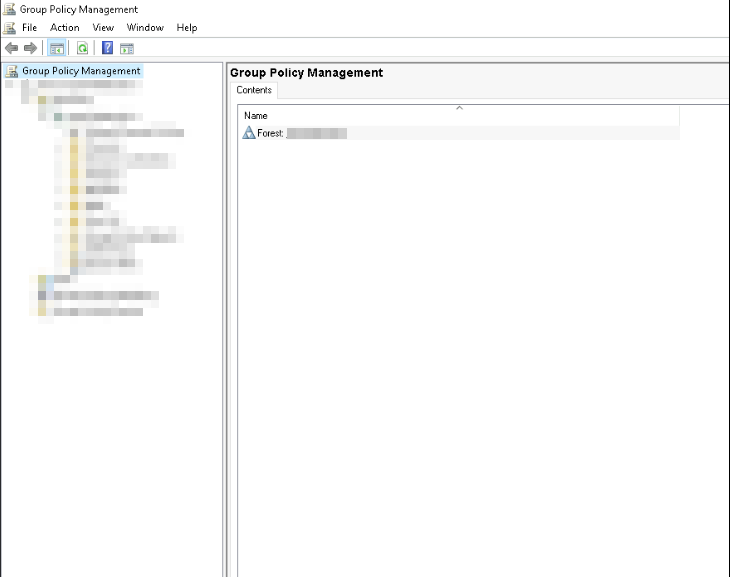
i.Log in to a domain-joined system with Administrative privileges.
ii.open it from Server Manager → Tools → Group Policy Management.
iii.Confirm that you can view the domain structure and existing GPOs.
Step 2 : Create a new Group Policy Object (GPO) with a suitable name.
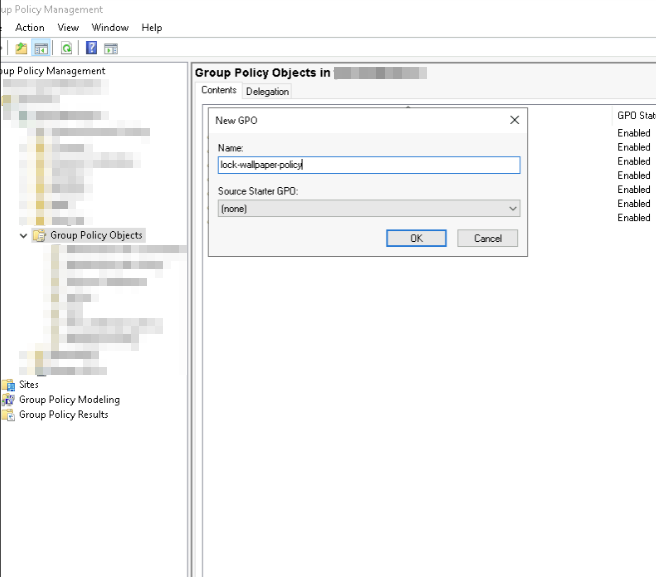
i.In the Group Policy Management Console, expand the domain.
ii.Right-click Group Policy Objects → New.
iii.Enter a meaningful name for the GPO (e.g., Wallpaper-Lock-Policy)
iv.Click OK to create the policy object.
Step 3 : Configure Required Settings in the GPO
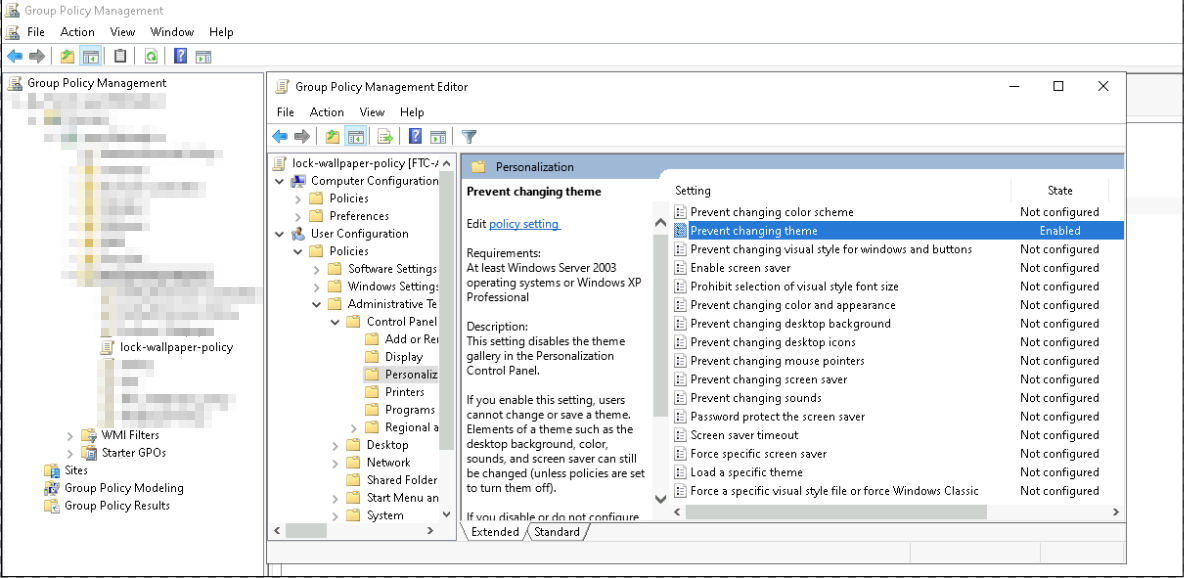
i.Right-click the newly created GPO → select Edit.
ii.The Group Policy Management Editor opens.
iii.Navigate to the required path depending on the policy type, for example:
1
User Configuration → Policies → Administrative Templates → Control panel → 	Personalization→ Prevent changing theme (for wallpaper lock)
iv.Enable the specific policy setting
v.Apply and close the editor once configurations are complete.
Step 4 : Link the GPO to the Appropriate Organizational Unit (OU)
i.In GPMC, locate the target OU where the policy should apply.
ii.Right-click the OU → Link an Existing GPO.
iii.Select the GPO you created and click OK.
iv.Verify that the GPO is now listed under the OU’s Linked Group Policy Objects.
Step 5 : Verify Policy Application
i.Log in to a target system and check if the new policy is applied (e.g., wallpaper is locked).
ii.Use the command gpresult /r to check detailed policy results:
iii.Confirm the correct GPO shows under applied policies.
C) Adding Windows and Linux Systems to Active Directory
Windows
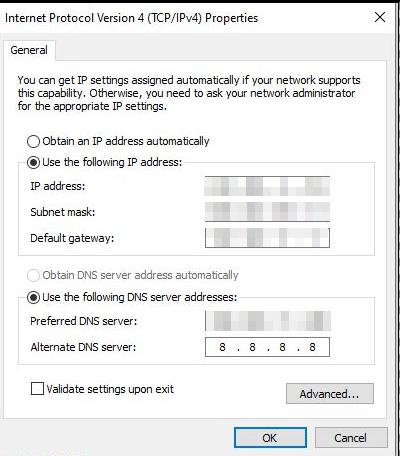
i. Open Control Panel → Network and Sharing Center → Change Adapter Settings, right-click the active connection, select Properties, disable IPv6, and set the IPv4 DNS to xxx.xxx.xx.xxx with an alternate of 8.8.8.8
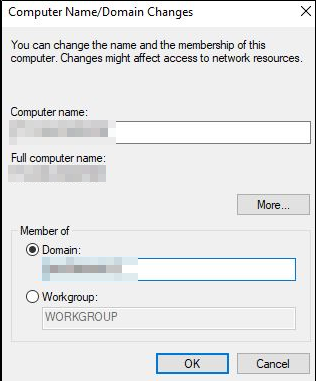
ii. Go to Settings → System → About → Advanced System Settings → Computer Name → Change, and update the domain name to join the AD domain.
Linux
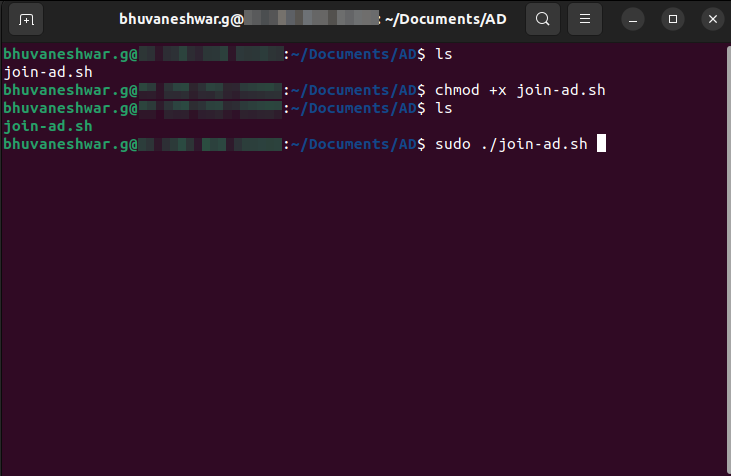
i. Ensure the join-ad.sh script is executable by running chmod +x join-ad.sh (the file will appear in green when executable), and then execute it using ./join-ad.sh to join the Linux system to the AD domain.
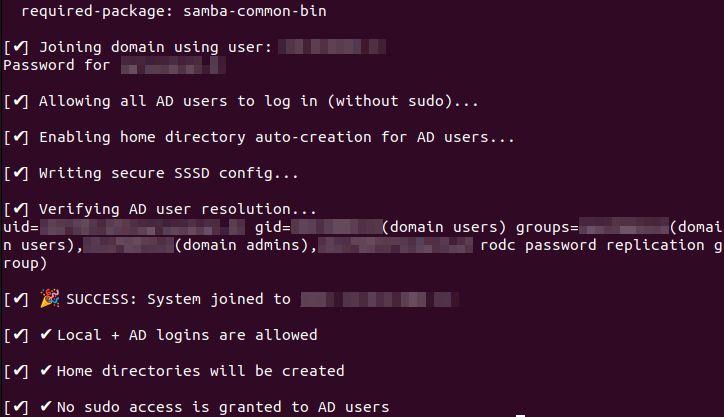
ii. An Admin user prompt will appear, and you can enter the AD admin password to complete the domain join.
join-ad.sh :
1
2
3
4
5
6
7
8
9
10
11
12
13
14
15
16
17
18
19
20
21
22
23
24
25
26
27
28
29
30
31
32
33
34
35
36
37
38
39
40
41
42
43
44
45
46
47
48
49
50
51
52
53
54
55
56
57
58
59
60
61
62
63
64
65
66
67
68
69
70
71
72
73
74
75
76
77
78
79
80
81
82
83
84
85
86
87
88
89
90
91
92
93
94
95
96

#!/bin/bash

# === CONFIGURATION ===
DOMAIN="" # Add your domain name
REALM=""  # Add your domain name
JOIN_USER="" # Add admin user name
AD_DNS=""  # Replace with your actual AD DNS IP

# === FUNCTION: Exit on error ===
error_exit() {
    echo -e "\n[✖] ERROR: $1"
    exit 1
}

log_info() {
    echo -e "\n[✔] $1"
}

# === 1. Check root ===
if [[ $EUID -ne 0 ]]; then
    error_exit "Run this script as root (sudo)."
fi

# === 2. Install required packages ===
log_info "Installing required packages..."
apt update -y || error_exit "apt update failed"
apt install -y realmd sssd sssd-tools samba-common packagekit adcli krb5-user \
    oddjob oddjob-mkhomedir libnss-sss libpam-sss || error_exit "Package installation failed"

# === 3. Configure DNS for AD resolution ===
log_info "Configuring AD DNS ($AD_DNS)..."
RESOLVED="/etc/systemd/resolved.conf"
if ! grep -q "^DNS=" "$RESOLVED"; then
    echo -e "\n[Resolve]\nDNS=$AD_DNS\nDomains=$DOMAIN" >> "$RESOLVED"
else
    sed -i "s/^DNS=.*/DNS=$AD_DNS/" "$RESOLVED"
    sed -i "s/^Domains=.*/Domains=$DOMAIN/" "$RESOLVED"
fi
systemctl restart systemd-resolved || error_exit "Failed to restart DNS service"

# === 4. Discover domain ===
log_info "Discovering AD domain..."
realm discover "$DOMAIN" || error_exit "Failed to discover AD domain"

# === 5. Join domain ===
log_info "Joining domain using user: $JOIN_USER"
realm join --user="$JOIN_USER" "$DOMAIN" || error_exit "Failed to join domain"

# === 6. Permit AD users (login only) ===
log_info "Allowing all AD users to log in (without sudo)..."
realm permit --all || error_exit "Failed to permit AD users"

# === 7. Enable home directory creation ===
log_info "Enabling home directory auto-creation for AD users..."
PAM_FILE="/etc/pam.d/common-session"
if ! grep -q "pam_mkhomedir.so" "$PAM_FILE"; then
    echo "session required pam_mkhomedir.so skel=/etc/skel/ umask=0077" >> "$PAM_FILE"
fi

systemctl enable oddjobd && systemctl start oddjobd || error_exit "Failed to enable/start oddjobd"

# === 8. Configure /etc/sssd/sssd.conf ===
log_info "Writing secure SSSD config..."
cat > /etc/sssd/sssd.conf <<EOF
[sssd]
domains = $DOMAIN
config_file_version = 2
services = nss, pam

[domain/$DOMAIN]
ad_domain = $DOMAIN
krb5_realm = $REALM
realmd_tags = manages-system joined-with-adcli
cache_credentials = True
id_provider = ad
access_provider = ad
ldap_id_mapping = True
default_shell = /bin/bash
override_homedir = /home/%u
use_fully_qualified_names = False
EOF

chmod 600 /etc/sssd/sssd.conf || error_exit "Failed to set permissions"
systemctl restart sssd || error_exit "Failed to restart SSSD"

# === 9. Validate ===
log_info "Verifying AD user resolution..."
id "$JOIN_USER" || error_exit "AD user not resolvable after join"

# === DONE ===
log_info "🎉 SUCCESS: System joined to $DOMAIN"
log_info "✔ Local + AD logins are allowed"
log_info "✔ Home directories will be created"
log_info "✔ No sudo access is granted to AD users"
Error Handling
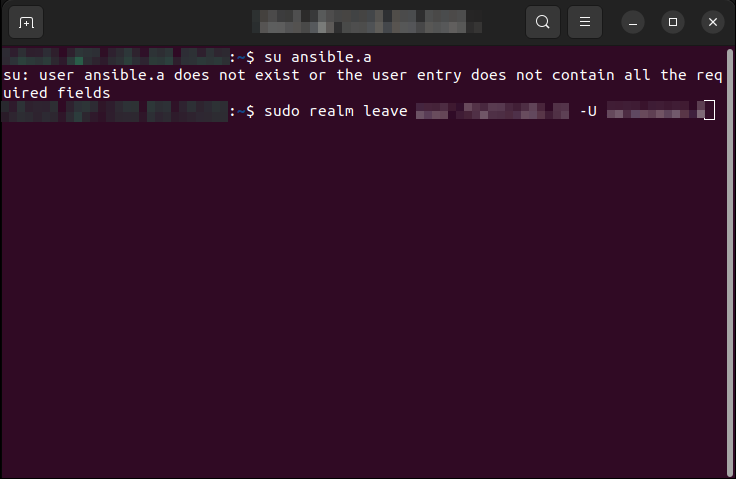
Issue: While switching the Active Directory (AD) user on a Linux system, the user change may fail with the error message “ user does not exist or the user entry does not contain all the required fields “.
Solution:
i.Log in as the root user (or switch to root using sudo su -).
ii.Remove the system from the AD domain using the following command:
1
sudo realm leave your.domain.com -U admin
iii.enter the Active Directory (AD) admin user password to authorize the domain leave operation.
iv.Re-run the join-ad script to rejoin the system to the AD domain
v. After successful domain join, verify that the required AD user is switched and accessible.
Outcome

i. The system is cleanly removed and rejoined to the AD domain, and the correct AD user is successfully applied.